Jenkins, you can't play yet, don't slap your face
content

foreword
Jenkins is a continuous integration tool developed based on java for monitoring continuous and repetitive work, including functions.
1. Continuous software release/testing
2. Monitor external call execution items
In fact, Jenkins has been around for a long time. The reason why it has become popular recently is that everyone is paying attention to devops, how to do continuous integration, continuous delivery, and how to do CI/CD. As a continuous integration tool, Jenkins is actually just a platform or a large framework. Its work is completely dependent on plug-ins, that is to say, you can find what kind of plug-ins you want to use.
advantage:
1. Using shell custom scripts to control the integrated deployment environment is more convenient and flexible
2. Simplify the lib package in the war package and reside in tomcat to reduce the transmission time of the war package
3. Jenkins user rights management, do not let naughty ghosts mess around
4. If the build fails, send an email to notify the relevant personnel to solve the problem
5. Automatic daily backup of war package, Jenkins configuration backup and version control
Jenkins installation
The installation of Jenkins is very simple. You can download the war package directly from the official website http://mirrors.jenkins-ci.org/war/latest/, use java -jar jenkins.war, or run it in a container like Tomcat. (JDK version 1.6 or higher is recommended to run). The default startup port of Jenkins is 8080, please note that the port is occupied. In addition, Jenkins files are actually in the ~/.jenkins directory. During the running process, you can find the jobs you have run and the corresponding log files here.
For the first installation, you can install all the plugins and try them yourself. If the download of the plug-in fails due to network reasons, you can copy the address from the failure details. After downloading, install it by uploading the hpi file.
system settings
The first step in the installation is to configure the relevant environment in Blobal Tool Configuration, such as JDK, MAVEN, GIT, etc. The corresponding path settings are to set the local directory of the Jenkins machine. It is recommended to complete all the configurations, otherwise there may be some small problems in the future operation. Can you try clicking? See help, still very useful.
Jenkins cluster configuration
The cluster configuration is also very simple, that is, the process of adding slave nodes. Click System Management -> Manage Nodes -> New Node, each configuration has a detailed help description.
In the startup method, it is recommended to use Launch slave agents>Build Job
In fact, this step is the general process of jenkins. You can refer to the various configurations of the interface for creating Job options to formulate your build plan, or we can directly use scripts to complete our build operations (recommended) Choose to build Execute shell, at the end of the article A shell build process for a complete project is attached.
Pipeline
Pipeline literally means pipeline, a plug-in for Jenkins that is very useful, arranges many steps in order, and executes the next after one. There are many jobs in the real working environment, such as compiling first, then performing static code inspection, unit testing, then deploying the server, restarting the server, and performing ui testing. We need to make some settings for these jobs to configure their upstream and downstream relationships.
This is where Pipeline comes in handy. On the Jenkins home page, click New View, then select Build Pipeline View, and then fill in Select Initial Job. After the build, you can select other Jobs, and so on. Such a pipeline is completed. Pipeline provides a view interface, where you can visually see the execution process and completion of the entire construction plan.
Jenkins is a powerful CI tool. Although it is developed in Java itself, it can also be used for project CI developed in other languages. The following explains how to use Jenkins to create a build task.
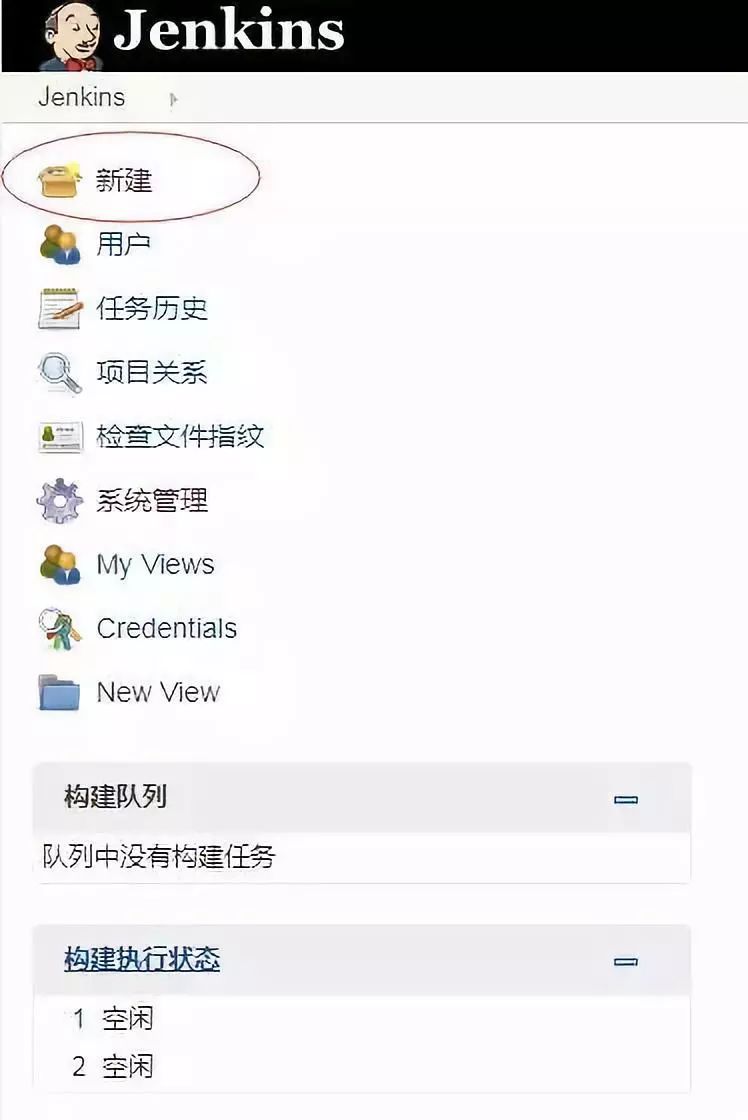
Log in to Jenkins and click New on the left to create a new build task.
Jump to the following interface. The task name can be set by yourself, but it needs to be globally unique. After entering the name, choose to build a free-style software project (other options are not described). And click the OK button below to create a build task. After that, it will automatically jump to the configuration page of the job.
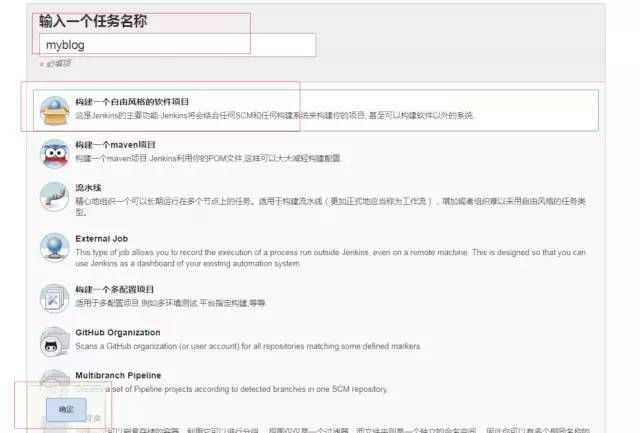
Create a new free-style software project
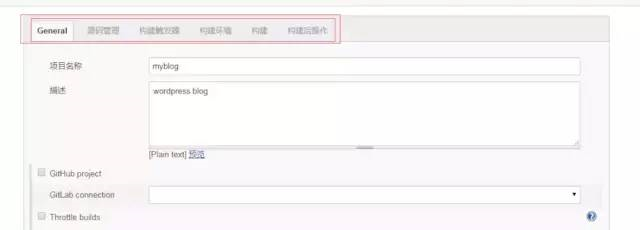
The figure below is the build task setting interface. You can see several options above: "General", "Source Management", "Build Trigger", "Build Environment", "Build", "Post-build Action". The following are introduced one by one.
General
General is some basic configuration for build tasks. name, description, etc.

General
Project name: It is the setting of the build task step just created, of course, it can also be changed here.
description: A description of the build task.
Discard old builds: Server resources are limited, and sometimes too many historical builds are saved, resulting in
Jenkins slows down and the server hard disk resources are also full. Of course, the "Keep Build Days" and the maximum number of build builds below can be customized, and a reasonable value needs to be determined according to the actual situation.
Several other options are not introduced here. If you are interested, you can check the "Help Information" of Jenkins, and there will be a general introduction. However, these "help messages" are in English.

Click on these "question marks" on the right to view "help information"
source code management
Source management is all about configuring where your code is stored.
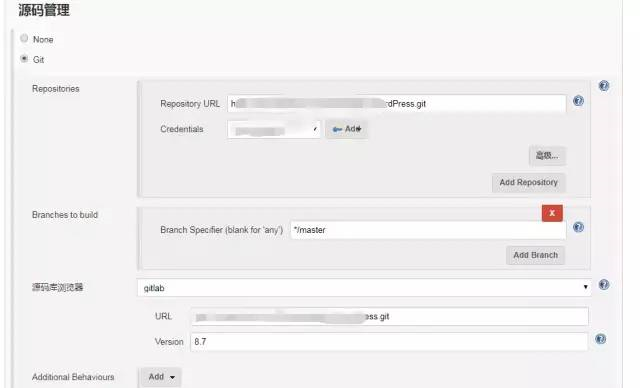
source code management
Git: Supports mainstream github and gitlab code repositories. Since our R&D team uses gitlab, I will only introduce this item below.
Repository URL: repository address
Credentials: Credentials. You can use HTTP username and password, or RSA file. But to add credentials through the "ADD" button behind.
Branches to build: Branches to build. */master represents the master branch, and can also be set to other branches.
Source code browser: The code repository management tool you use, such as github, gitlab.
URL: Fill in the warehouse address above.
Version: 8.7 This is the version of our gitlab server.
Subversion: It is SVN, which will not be introduced here.
build trigger
Build triggers, as the name suggests, are triggers for building tasks.
Trigger a remote build (for example, using a script): This option provides an interface that can be used to trigger a build at the code level. I will not introduce it here, it may be used later.
Build after other projects are built: This option means "build after other projects are built". It is not introduced here, and this option may be used later.
Build periodically: Build periodically. It is well understood that it is built every once in a while. similar schedule
linux crontab writing format. The settings shown in the figure below indicate that the build is performed every 30 minutes.
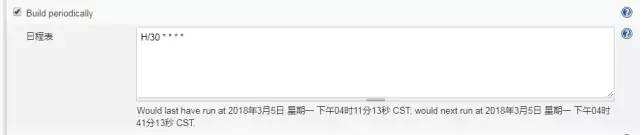
cycle build
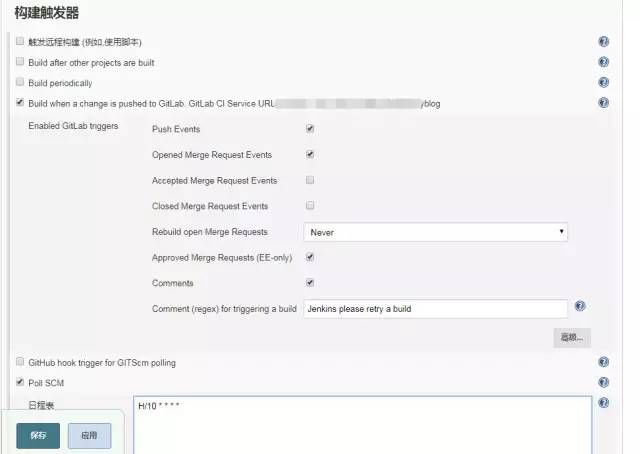
Build when a change is pushed to GitLab: When a change is pushed to the gitlab code repository, the build is triggered. After that, there will be an address that triggers the build, generally called webhooks. This address needs to be configured into gitlab. How to configure webhooks will be described later. This is a commonly used build trigger.
Poll SCM: This option is used in conjunction with the above option. When the code repository changes, jenkins doesn't know about it. This option needs to be configured to periodically check the code repository for changes.

Check every ten minutes

Build tools in the build environment
With Ant: Select this tool and specify the ant version and jdk version. The versions of these two tools were installed on the server in advance and configured in the jenkins global tool.
Other options are not introduced, and you can also check "Help Information" for usage help.
5. Build
Select Add Build Steps below.
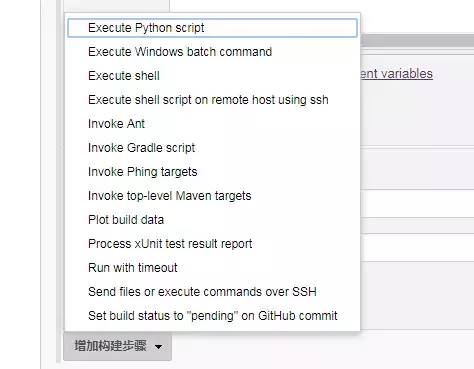
Add build steps
There are many options to choose from. Here we introduce "Invoke Ant" and "Execute shell".
Eexecute shell: Execute shell commands, this tool is for the linux environment, and the windows environment also has a corresponding tool "Execute Windows batch command".
Before building, we may need to execute some commands, such as decompressing the compressed package. To demonstrate, I simply execute the "echo $RANDOM" command to generate random numbers in the linux shell.
Invoke Ant: Ant is a java project building tool, and of course it can also be used to build php.
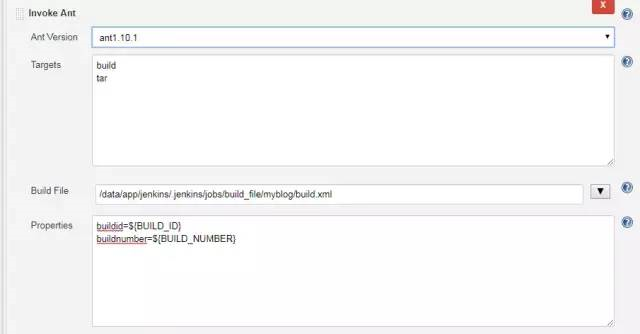
Ant Version: Select the Ant version. This ant version is the version installed on the jenkins server and needs to be set up in the jenkins "system tools".
Targets: Actions to perform, one action task per line. Take the above figure as an example, build is to build, and tar is to package.
Build File: It is the configuration file built by Ant. If it is not specified, it is the build.xml in the workspace directory under the project path. How to configure the build.xml file will be discussed in detail later.
properties: Set some variables, these variables can be referenced in build.xml.
Send files or execute commands over SSH: Send files to a remote host or execute commands (scripts)
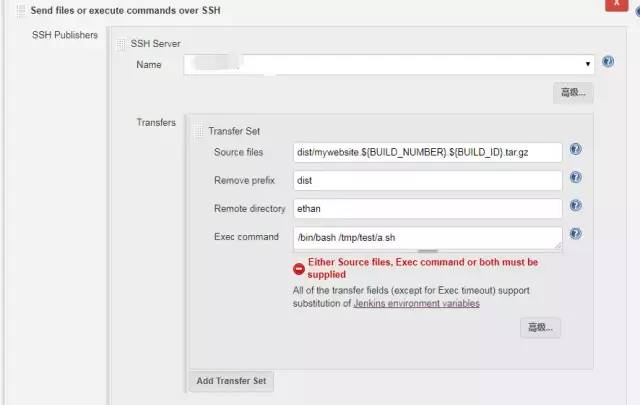
Name: The name of the SSH Server. SSH Server can be configured in jenkins-system settings.
source files: The source files that need to be sent to the remote host.
Remove prefix: remove the preceding path. If this parameter is not set, the remote host will automatically create the path contained in the build source source files.
Remote directory: The remote host directory.
Exec command: The command to be executed on the remote host, or the script to be executed.
6. Post-build operations
Post-build operations are some follow-up operations after the project is built, such as generating corresponding code test reports.
E-mail notification
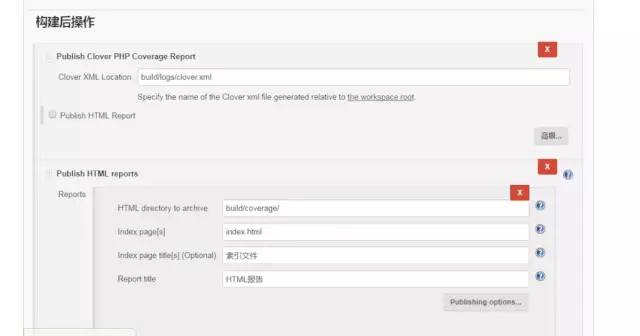
Publish Clover PHP Coverage Report: Publish a file report of code coverage in xml format. The path will be defined in the "build.xml" file
Publish HTML reports: Publish HTML reports of code coverage.
Report Crap: Publish a crap report.
E-mail Notification: Email notification, send an email to the specified mailbox after the construction is completed.
After the above configuration is complete, click Save.
Well, this is the end of the study. If you want to know more about it, please follow me! Here is a letter I want to write to my readers! Remember to read carefully!
Thanks to everyone who read my article carefully, watching the rise and attention of fans all the way, there is always a need for gift exchanges, although it is not a very valuable thing, if you can use it, you can take it directly for free:———————————————
"learning materials note tool document collection"
Scan the QR code,
note "csdn999" and
invite you to study together~~
Discuss test technology with like-minded test partners
Be sure to note the code: CSDN999
——————————————————